
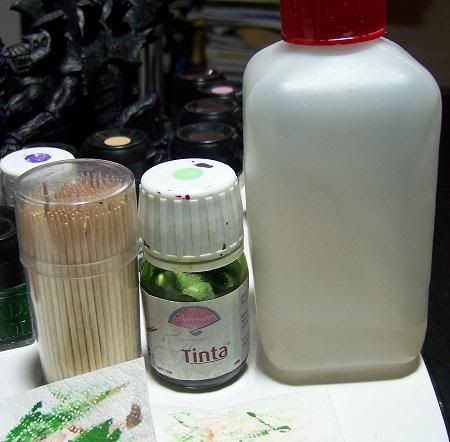
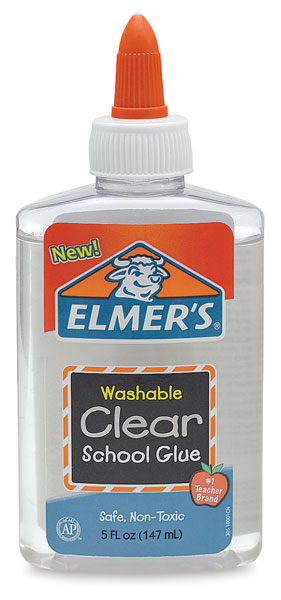
- The cheapest paper glue you can find, the nice, oozy ones that dry up into thick, see through slabs are ideal. We're talking the slimey stuff you know will mess up anything paper you want to glue to something else (see further below for more info).
- Some, cheap, disposable applying tool. Personally I like those small cocktail sticks you see in all the supermarkets.
- Ink of choice of colour (see step 6 for an alternative approach).
- Paper tissue.
- A relatively fine brush.
- And finally, a mini to apply it to.
Things to keep in mind before starting:
A. While I have tried and succeeded making ichor with three different brands of paper glue I do advice anybody trying this to do a testmini first. Even some pieces of cut-up sprue will be useful for this. First off it will give you a good feel of the end product, thus giving you the option to see if you really like the effect prior to (potentially) messing up a mini you slaved away on for hours. Secondly, I have encountered a single brand of paper glue so far that really didn't do the trick. Luckily the stuff is so cheap that getting two different brands isn't going to be an issue.
B. When applying the ichor (explained further below) it is best to use a new stick with every new batch or mini as it does tend to get stringy real fast.
C. Though these strings aren't really a problem to remove or deal with, it is best to start with a clean working area devoid of other minis you could potentially ooze-up.
2. Squeeze some glue out of the bottle unto the paper towel or tissue in your working area. Next take your mixing tool and dip it in the ink of the colour you're aiming for.
3. Using the mixing tool to...well mix the glue and the ink. Note of warning though, most glues seem to react quite fast with the ink. So once you're done mixing it will quickly turn into a stringy, pastelike substance. Ideally you should try to do the mixing and applying in a matter of 10-30 seconds, so mixing small batches and using fresh mixing tools with every batch is advicable.
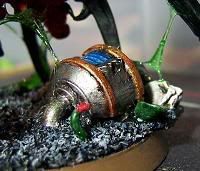
4. Depending on the amount of ichor you mixed and its state you should be able to create everything from strains of slime to full orifice-covering slime layers. Applying is very simple, though challenging to explain. You pretty much take a blob of the ichor on the stick, gently blob it on an area of the mini and move on to the next spot. Speed and amount of ichor on the stick will impact the effect and area you can cover.Simply put, try it on an empty sprue two or three times and you'll get a feel of how your glue works best for you.
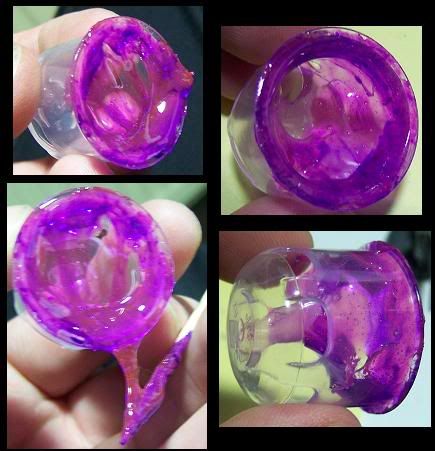
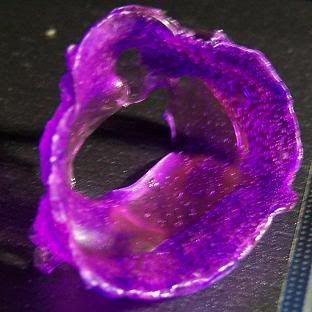
In the picture below you can see several different colours of ichor, as well as an example of it covering a larger area:

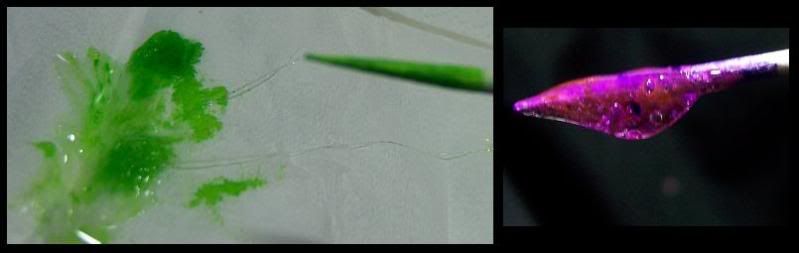
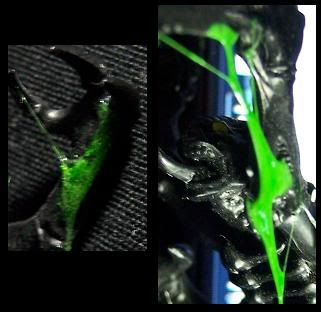
6. You can still make this kind of ichor even if you don't have or use inks. Simply take the paint colour of your choice (this has only been tested with GW paints, but should work just fine with most paints) and thin it with water. Use this mix with the glue instead of the ink. Depending on the consistancy and water/paint ratio of this mix you will be able to create a range of different effect. If you only use a bit and make it extra watery you'll be very close to the effect you normally get with ink. If you put in more paint you can create a more cartoony looking slime, as seen below in the picture on the right:
Additional information on paper glue
Well I got a question over at Astronomican forums concerning the glue I used, apparantly the term paper glue isn't all that international as I was assuming.
Paper glue, unlike PVA glue, is already translucent and has a bit of a slimey structure as well. I've also seen it being referred to as clear glue and, due to the harmlessness of its contents, is often used for children's hobby classes.
Simply put what you are looking for is a clear, oozy glue that is usually sold in a clear bottle for mere cents.

Another question concerned potentially substituting clear glue with PVA glue. Now PVA glue does dry up all clear, however it doesn't have the same, nice combination of stringiness, durability and flexibility of the ink/paper glue mix. This is most likely due to the more watery nature of PVA glue. So in principle you should be able to use PVA glue, but it will be much harder to apply, the mix consistency will only be determinable after it dries and it will be much more difficult to cover / transgres larger areas.
And that concludes another mini-tutorial, as always I'll be more than happy to answer any and all questions!


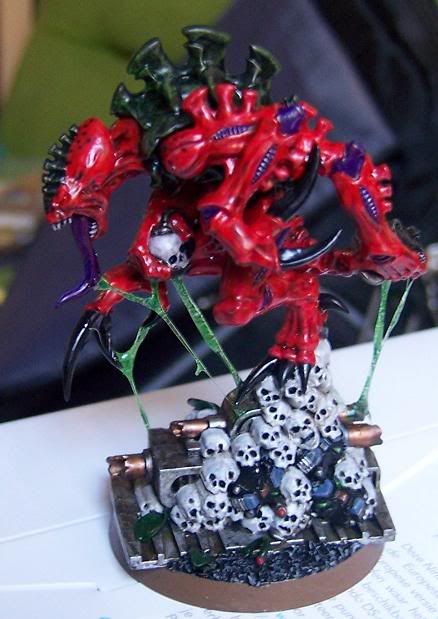
Heph, that looks so brutal. I love it.
ReplyDeleteThanks Alex! Also just joined Terran Forge, somehow I am checking the blog regularly but never clicked on 'follow' Talk about embarassing!
ReplyDeleteOh wow... that looks awesome. Thanks for the tip! I'm definitely going to incorporate that into any of a Tervigon conversion as well as giving my Venomthropes more pop when I get to them!
ReplyDeleteThis comment has been removed by the author.
ReplyDeleteI have this exact glue and for some reason it pools back together at the joints - it never leaves strings in between, they all stretch back to both points of contact.
ReplyDeleteAny tips? This is with both the paint and ink (using old citadel ink I have leftover)
Slightly sluggish delay here ;-)
ReplyDeleteGood question there, it may be something specific to this particular brand of glue. Looking back now I noticed that the glue I was using was slightly different. Mine is an old bottle that apparantly doesn't have extra ingredients to make it 'washable'.
I may however just be a drytime issue, perhaps if you let the mix of ink and glue dry up a little longer before applying it you could get the stringy effect?
Thx as a nurgle player I shall also benefit from this 😀
ReplyDeleteI tried the technique with Elmers clear glue that you had pictured, and i had no luck, it would not string, meaning, when i tried to stretch it from point a to point b, it would snap and pool. I waited an hour and one half to let the glue firm up, but still, it would snap. any suggestiions?
ReplyDelete