
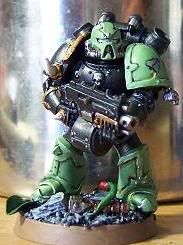
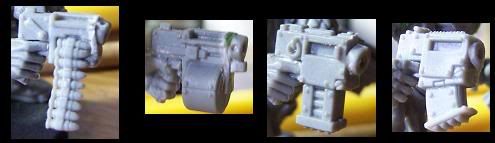
After several people asked me how I made the bolters for my Purge Chaos Space Marines I decided to make this conversion guide. Though this weapon looks great on Nurglesque models it should also work for others. I can imagine veterans marines of the Imperial Fists would look great with these as well. So about time I added this article I wrote for Astromag issue 2 to my blog's tutorial section!
To get started you will need the following items:
- A (Chaos) bolter.
- A spare Ork barrel-loaded shoota.
- Glue and a cutting tool.
- Some plasticard.
- Greenstuff (only needed to fill a gap here and there)
- A (Chaos) bolter.
- A spare Ork barrel-loaded shoota.
- Glue and a cutting tool.
- Some plasticard.
- Greenstuff (only needed to fill a gap here and there)

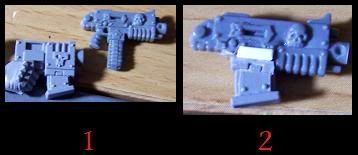
2. Clean any mold line of the bolter and remove the triggerarea. In addition you may want to drill out the gun barrel at this stage.
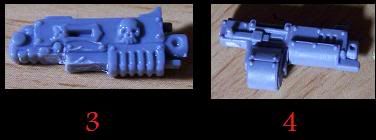
4. Time to move on to the shoota, remove the trigger to make further cutting easier.
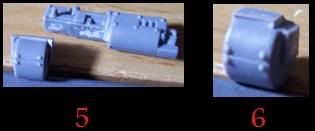
6. Cut of a small section of the barrel’s support as shown in the picture above.
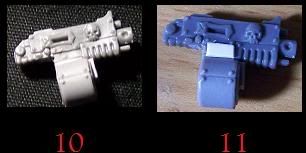
8. Cut of a very small segment of the square on the top of the barrel. We’re talking 0.5 to 1 mm, this will allow the barrel to line up with the thinner bolter.
9. Frontal view of the cut up barrel.
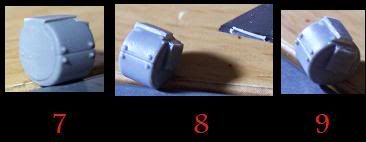
11. Cut out 2 small plasticard segments and glue them into place as shown above. Once painted they add to the bulkier look of the gun.
13. Keep in mind though that the slightly bigger bolter may require you to make some small corrections on the bolter-supporting arm. Luckily a small adjustment and blob of greenstuff will take care of this in seconds.
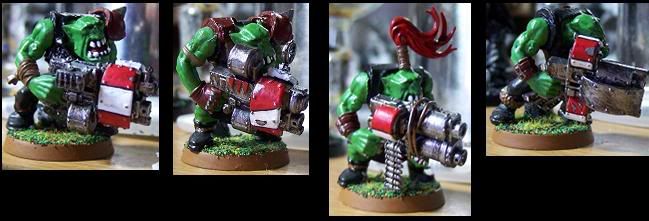
But the fun doesn’t have to end here, this ammo/weapon-swap idea can be applied to a wide range of other conversions. Here are some additional ideas to gets those creative juices flowing, so dive into that bitsbox and get converting. Your options are afterall only limited by your own creativity!
2. Using the same method as the barrel-loaded bolter you now have yet another option to add some more variety. By just swapping around some ammo clips and cutting down shootas you can also easily create more variety in the sluggas carried by your Boyz:
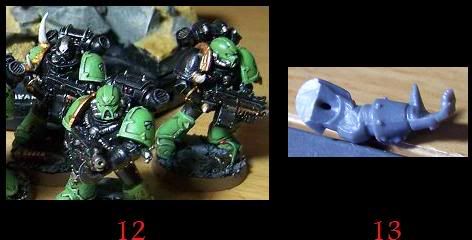
One could even take this so far that the very weapon becomes the defining feature of the mini, aiming it with huge, outlandish weaponry. I applied this idea to my old Ork Flash Gitz. This was many, many years before the current plastic kit came out. But liking the Dakka I needed some extra shooty-looking lads, but I also wanted some way to represent their More Dakka and Shootier upgrades. This led to the following wacky conversions on a unit which served my Warlord very well indeed!
And that concludes this mini-conversion guide, I hope this has given some of you guys and gals out there a couple of ideas. So have fun converting and keep an eye out for more of these conversion articles in the near future!


Oh those barrel-loaded bolters are fantastic!!!
ReplyDeleteI am definitely going to steal this idea :D
Glad I could provide some ideas, about time I put my Astro Magazin article on my blog right!
ReplyDelete